Sending Requests in Web Scraping: cURL, Chrome, Firefox, REST.client, netcat

Table of Contents
Contents:
- Chrome Dev Tools
- Copy as cURL
- cURL options: proxy, show only headers
- Firefox: edit&resend; multi-account containers
- cURL to Python scraper converter
- VS Code REST.client extension
- HTTP server one-liner for debugging
While working with scraping, I have to quickly debug and replay a lot of web requests every day. Web scraping process usually consists of two phases:
- Retrieve the response effectively
- Extract & transform the response to structured data
In this writeup I will go through the first part - sending requests & debugging responses effectively. Later I will publish the second part related to extracting data from from the output.
Tip #1: Use Chrome Dev Tools!
Chrome is the main & invaluable scraping tool for me. Major part of investigation work happens in Dev Tools console. If you have never seen this console, I recommend to check the official Chrome guide.
Hotkey to launch Inspector is Option+Cmd+I on Mac.
When debugging responses, I mostly use "Network" tab. Here is the Chrome team video about this part of dev tools:
Tip #2: "copy as cURL" and "copy as fetch"
One of the most used features of Network panel for me is the "Copy as CURL" and "Copy as Node.js fetch" operation which you can do on every network request:
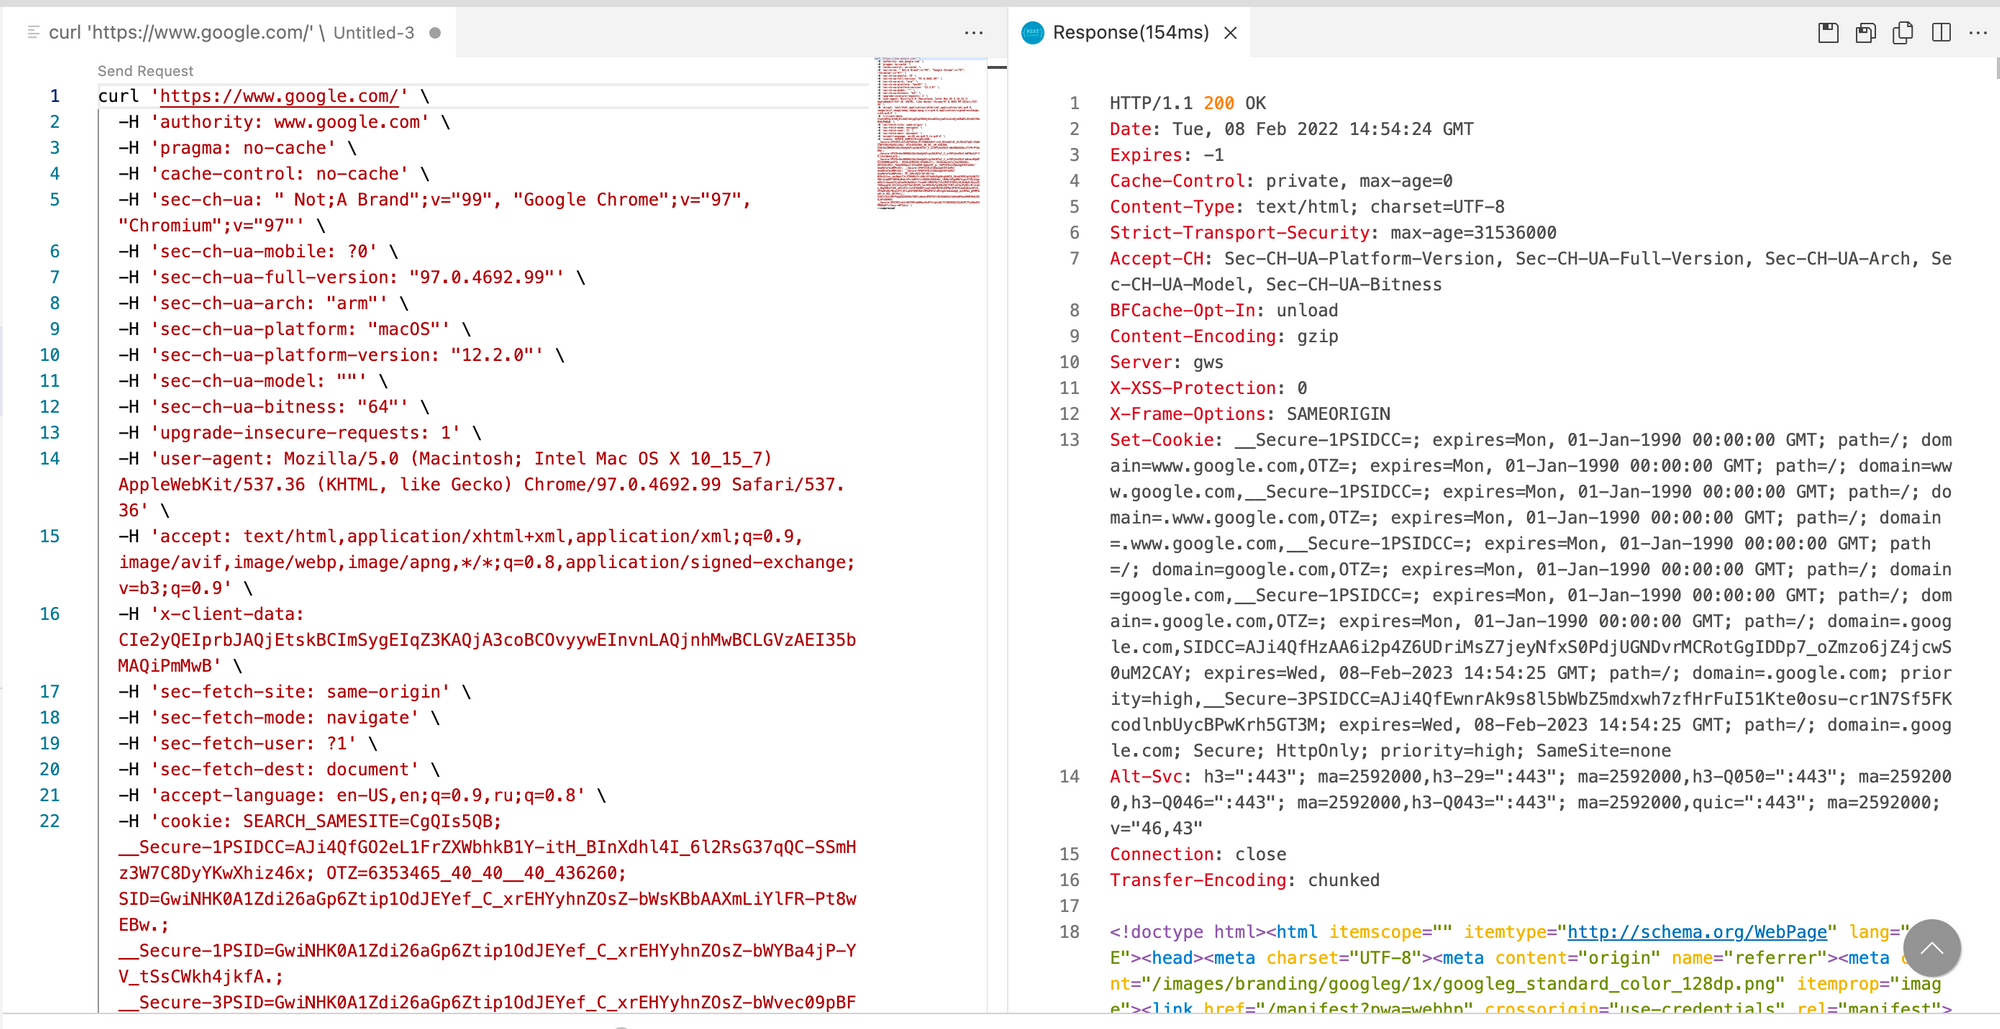
Find the relevant request in "Network" tab and right click to get the "Copy -> Copy As CURL" command.
After I have copied the cURL command, I usually paste it into my text editor (VS Code with REST.client, read more about this below) and review/modify the parameters which are sent to the target website.
Tip #3: get proficient with cURL options
Even if you prefer to get your hands dirty with JS/Python, learning cURL options is very useful. Let's say you have copied the cURL request from Chrome Dev tools, then you can launch the cURL from your terminal, and here are the options I use a lot:
3.1 Specify proxy in cURL:
--proxy http://login:pw@proxyhost:port
note that there is a space and not '=' sign between options in cURL. if you do --proxy=<proxy> you will get curl: option --proxy=<proxy>: is unknown error. For some reason, it took me some time to get used to!
3.2 Debug the request/response headers in cURL
-v this shows not just http output but also all the headers and the process of client-server interaction.
3.3 Hide the output and leave only debug info and headers in cURL
There are basically two ways:
--head and -o /dev/null
This is helpful because without suppressing the output you will probably have troubles scrolling back to the headers of the response in your terminal.
So, typical request for debugging, and with proxy specified, looks like this:
curl https://example.com --head -v --proxy http://login:pw@proxyhost:port
Tip #4: Firefox is sometimes even better!
Once you are comfortable working in Chrome Dev Tools, you will feel right at home in Firefox Dev Tools - it's very similar. But, it has some convenient features:
4.1 Firefox Edit & Resend
The killer feature of FF is that you can modify some request and re-send it to the target website without going through cURL copy&pasting!
This allows even faster iterations in testing your ideas.
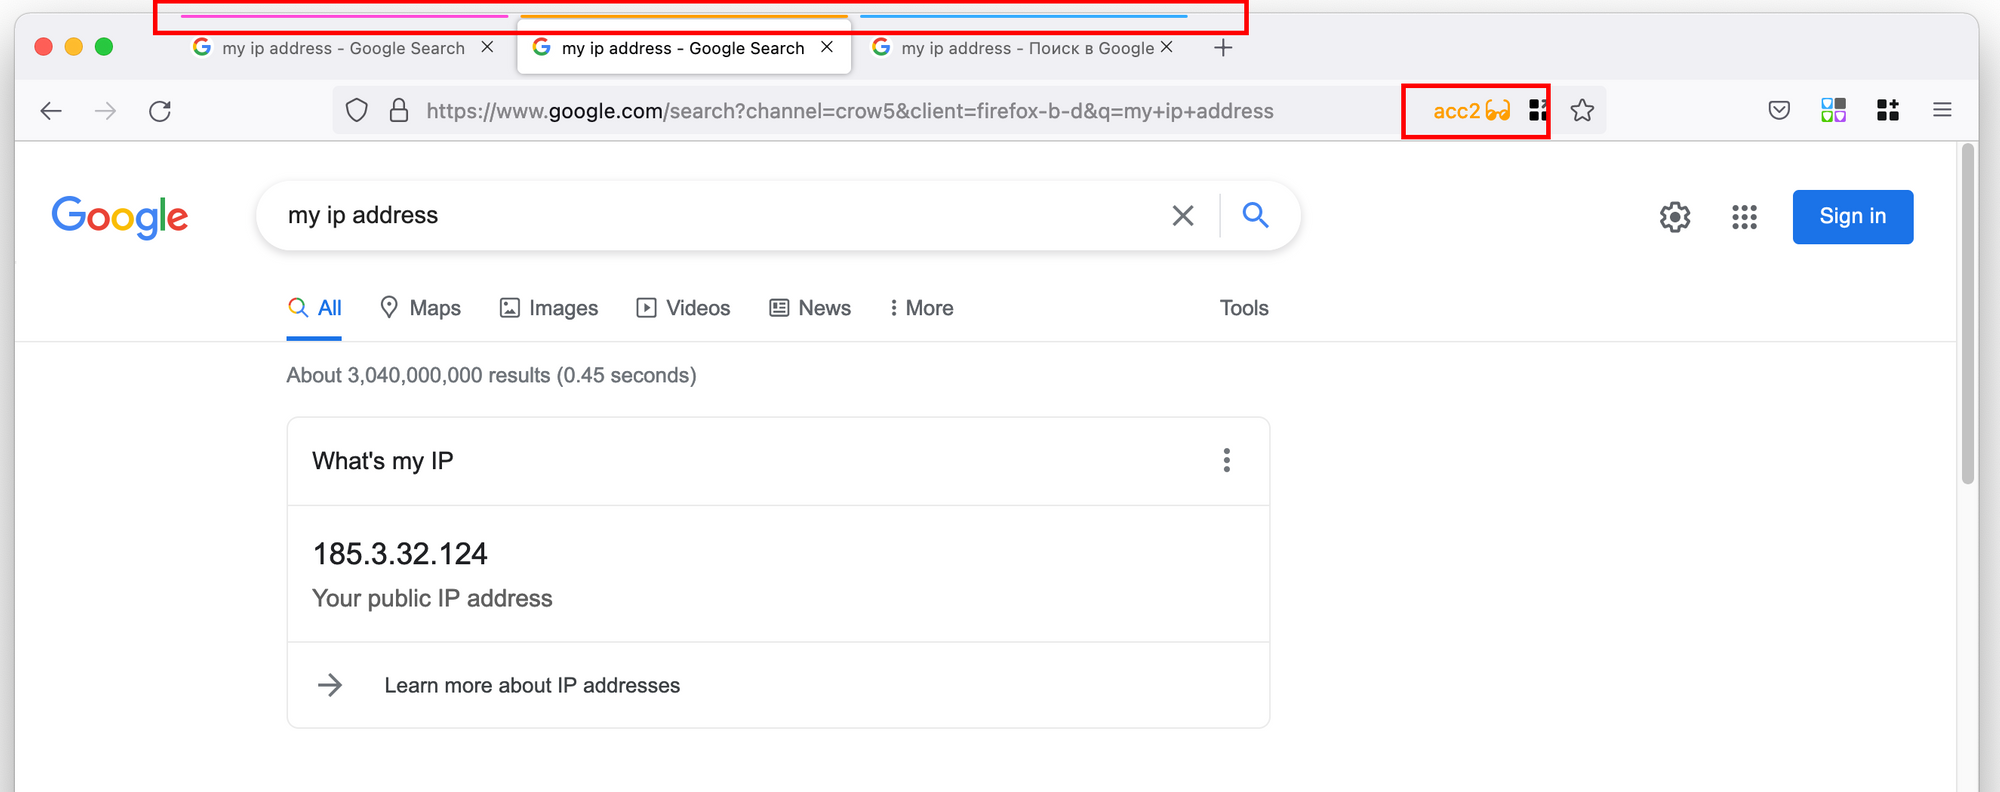
4.2 Firefox Multi-Account Containers is a better alternative to Chrome Incognito mode
Firefox Containers is an extension which effectively turns your browser into a multi-browser environment - each "container" has its own cookies. This is a like an "Incognito" mode in Chrome but in a lot of ways it is more convenient.
The best part about containers is that each container can have its own proxy specified via additional extension https://addons.mozilla.org/en-US/firefox/addon/container-proxy/ so you can have three tabs opened, each using its own proxy! Actually Containers recently got out of the box proxy support but I find this separate extension work better for some reason.
This turns out to be useful not just for scraping, but for general web browsing: for example, Google Play Console was unable to work properly in multi-account Google setup, so you need to log out of all your Google accounts and leave just one every time to check your Android app state! Firefox multi-account containers can be very useful in this case.
Tip #5: converting cURL to Python
JS developers have slight advantage over Python devs: both Chrome and Firefox has "Copy as fetch" along with "Copy as cURL", but there is no "Copy as Python".
Let's fix this, here is how cURL can be converted to Python code:
5.1 Convert cURL to plain Python Requests online
curlconverter.com is a useful service which will quickly convert your cURL code to Python.
5.2 Convert cURL to Python Requests with residential proxies and retries
scrapeninja.net will do even more - not only it will convert your cURL to Python Requests code, it will also leverage special scraping cloud API which will automatically:
- Use rotating residential proxies (and you can choose multiple proxy locations)
- Have TLS fingerprint of Chrome browser instead of TLS fingerprint of Python which helps to unblock a lot of websites
- Leverage smart retry strategies
Tip #6: VS Code REST Client extension ( humao.rest-client ) for cURL and API debug
I will be honest with you - I don't like Postman (for a number of reasons).
The best alternative to Postman that I could find for my workflow is REST client extension for VS Code. It is not a direct Postman competitor, it is much more minimalistic, and it augments text files which may contain cURL and special HTTP commands.
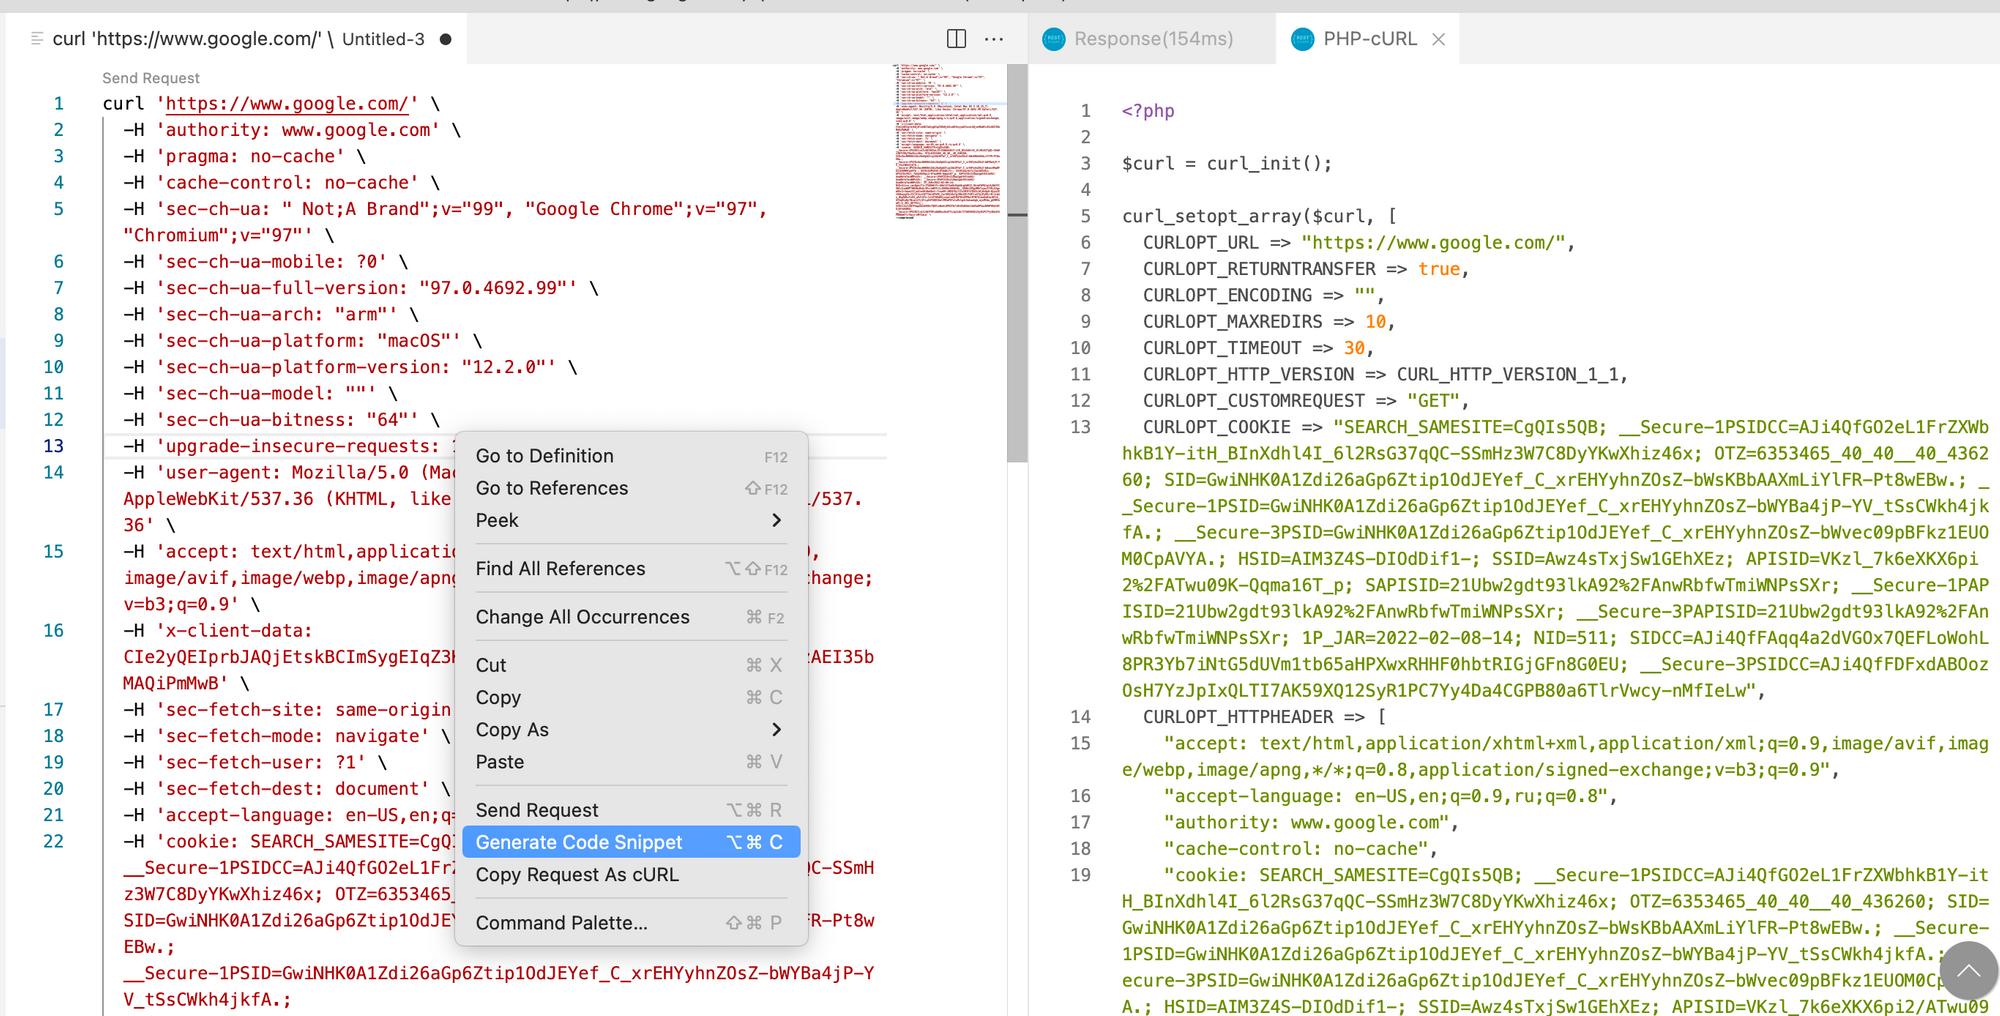
I think REST client is fantastic, and one of the wonderful features is, again, cURL functionality which allows to execute cURL requests and generate JS/Python code without leaving your editor!
Editing and sending huge cURL command through this kind of GUI is in a lot of cases more convenient than using terminal.
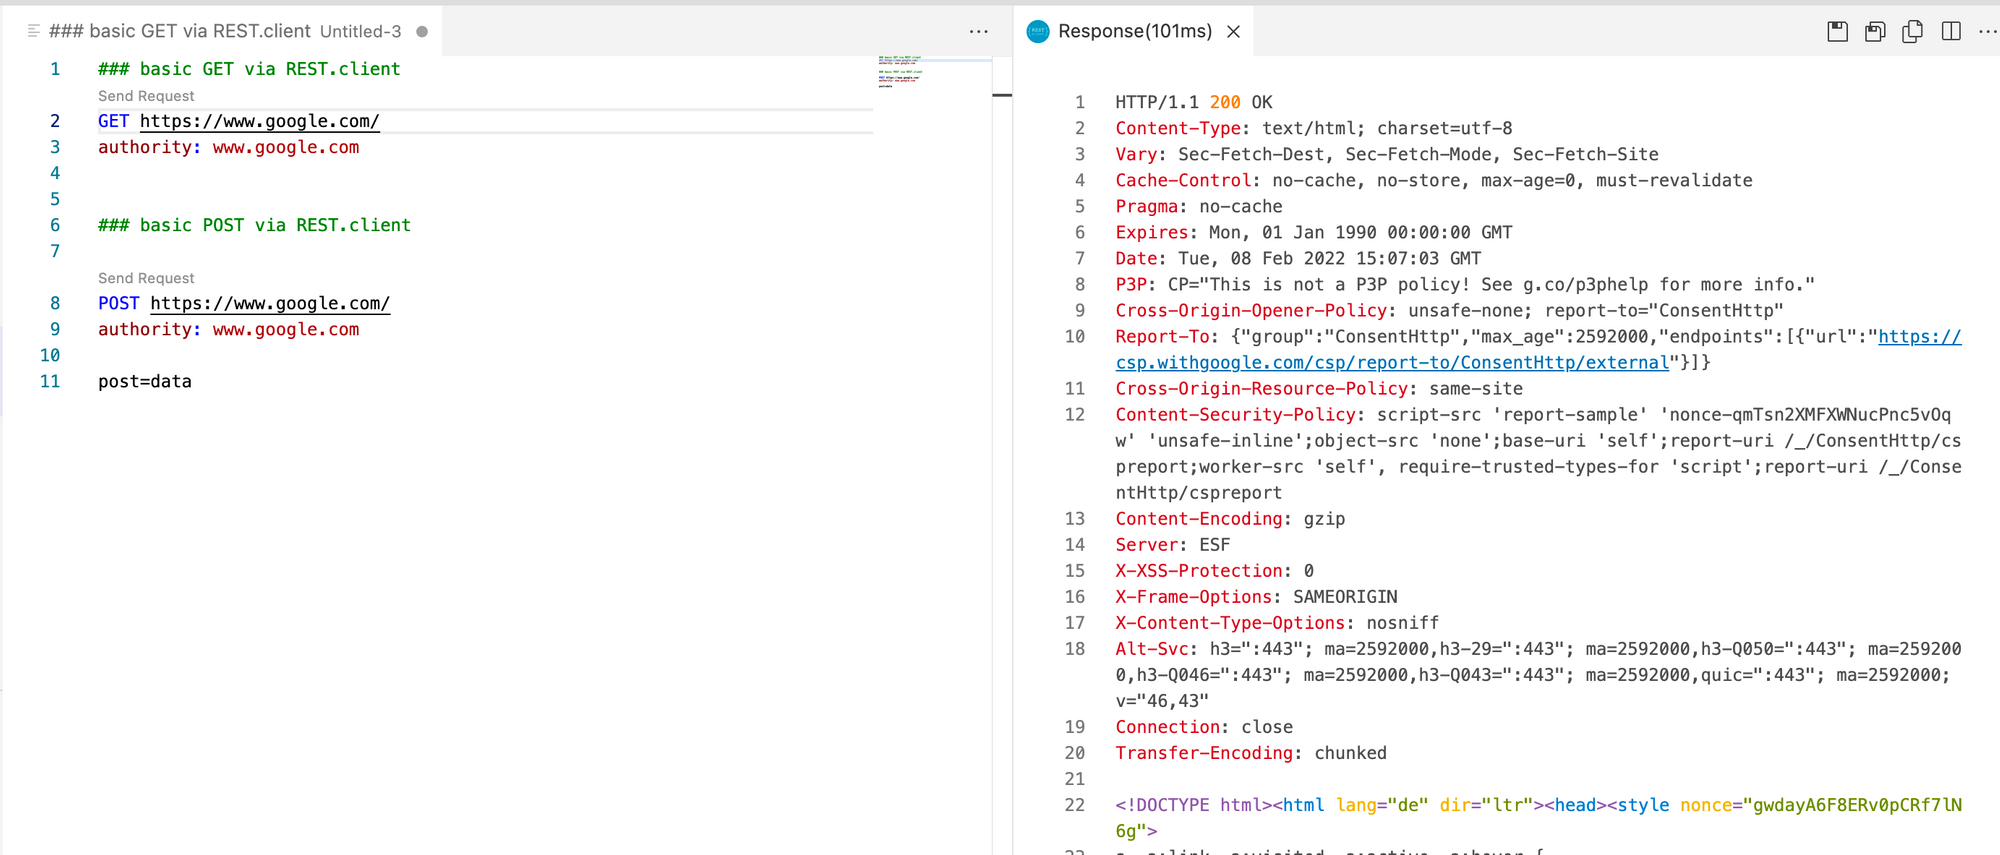
I also use this extension to describe and test my Node.js APIs all the time, and it is very convenient for this, as well. REST.client has its own very simple syntax to describe HTTP request (the screenshot below) - this syntax is noticeably simpler than OpenAPI so it's easy to write the HTTP request without scratching your head around the syntax and YAML nesting. It has full support of variables (from the same file, and even from .env file) while being a very readable format. I love the idea of having all my API HTTP requests in single plain text file - I now usually have api.http file in every github repo which contains API server, to be able to quickly interact with my service.
This extension is very light, minimalistic, unobtrusive and useful at the same time. Pretty much like VS Code!
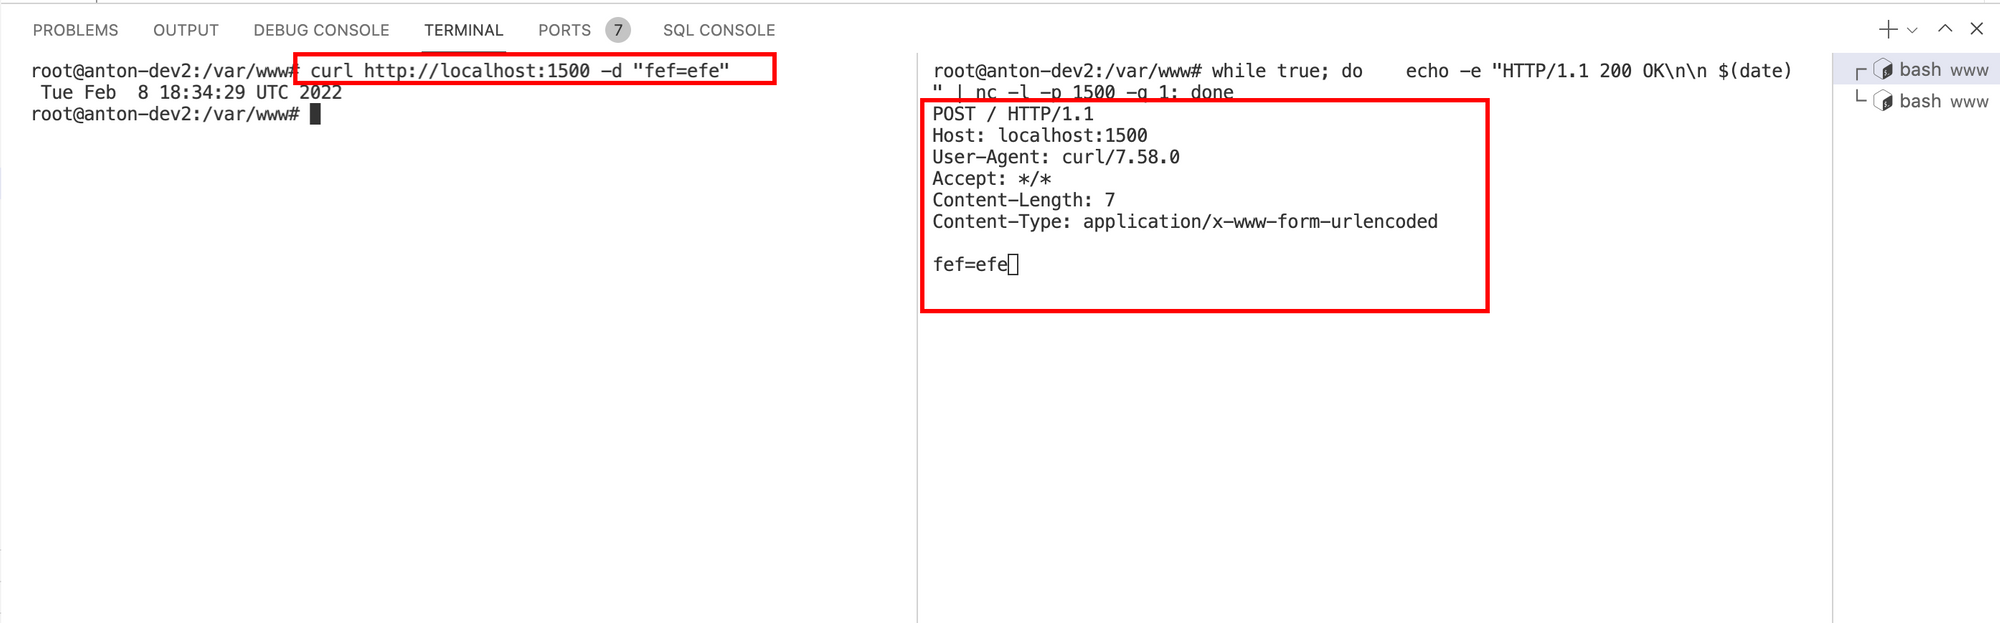
Tip #7: debugging raw HTTP request from the server side
Sometimes it is very useful to see what exactly target web server receives as a request to validate if all the headers generated in your code are looking good. There is a number of solutions to do this, but one of the nice minimalistic ways is to use netcat utility which can listen for a port and dump the request. Here is the bash script (tested in Ubuntu):
while true; do
  echo -e "HTTP/1.1 200 OK\n\n $(date)" | nc -l -p 1500 -q 1
done