Launching ModelRift: a web-based IDE for parametric 3D modeling
Table of Contents
Last week I got a message from a parent: "Hey, my 9 year old son uses ModelRift for creating things for his 3D printer, it's great! Product feedback: You should probably ask me to pay now, I feel like I've used it enough."
That one landed. Let me tell you how this thing came to exist.
The rabbit hole
I bought a 3D printer. Turned out to be the best purchase I'd made in years.
After printing a few things from Makerworld and Printables, I fell headfirst into parametric CAD design. Fusion 360, flanges, hinges, chamfers, fillets, loft, sweep, revolve. I learned words I'd never needed before. At some point I realized I was more interested in designing models for other people than printing them myself.
Then I found OpenSCAD. It's essentially a DSL for 3D modeling: you describe geometry as code, and it renders the result. As a programmer, this felt like home. No mouse, no GUI, just code and math.
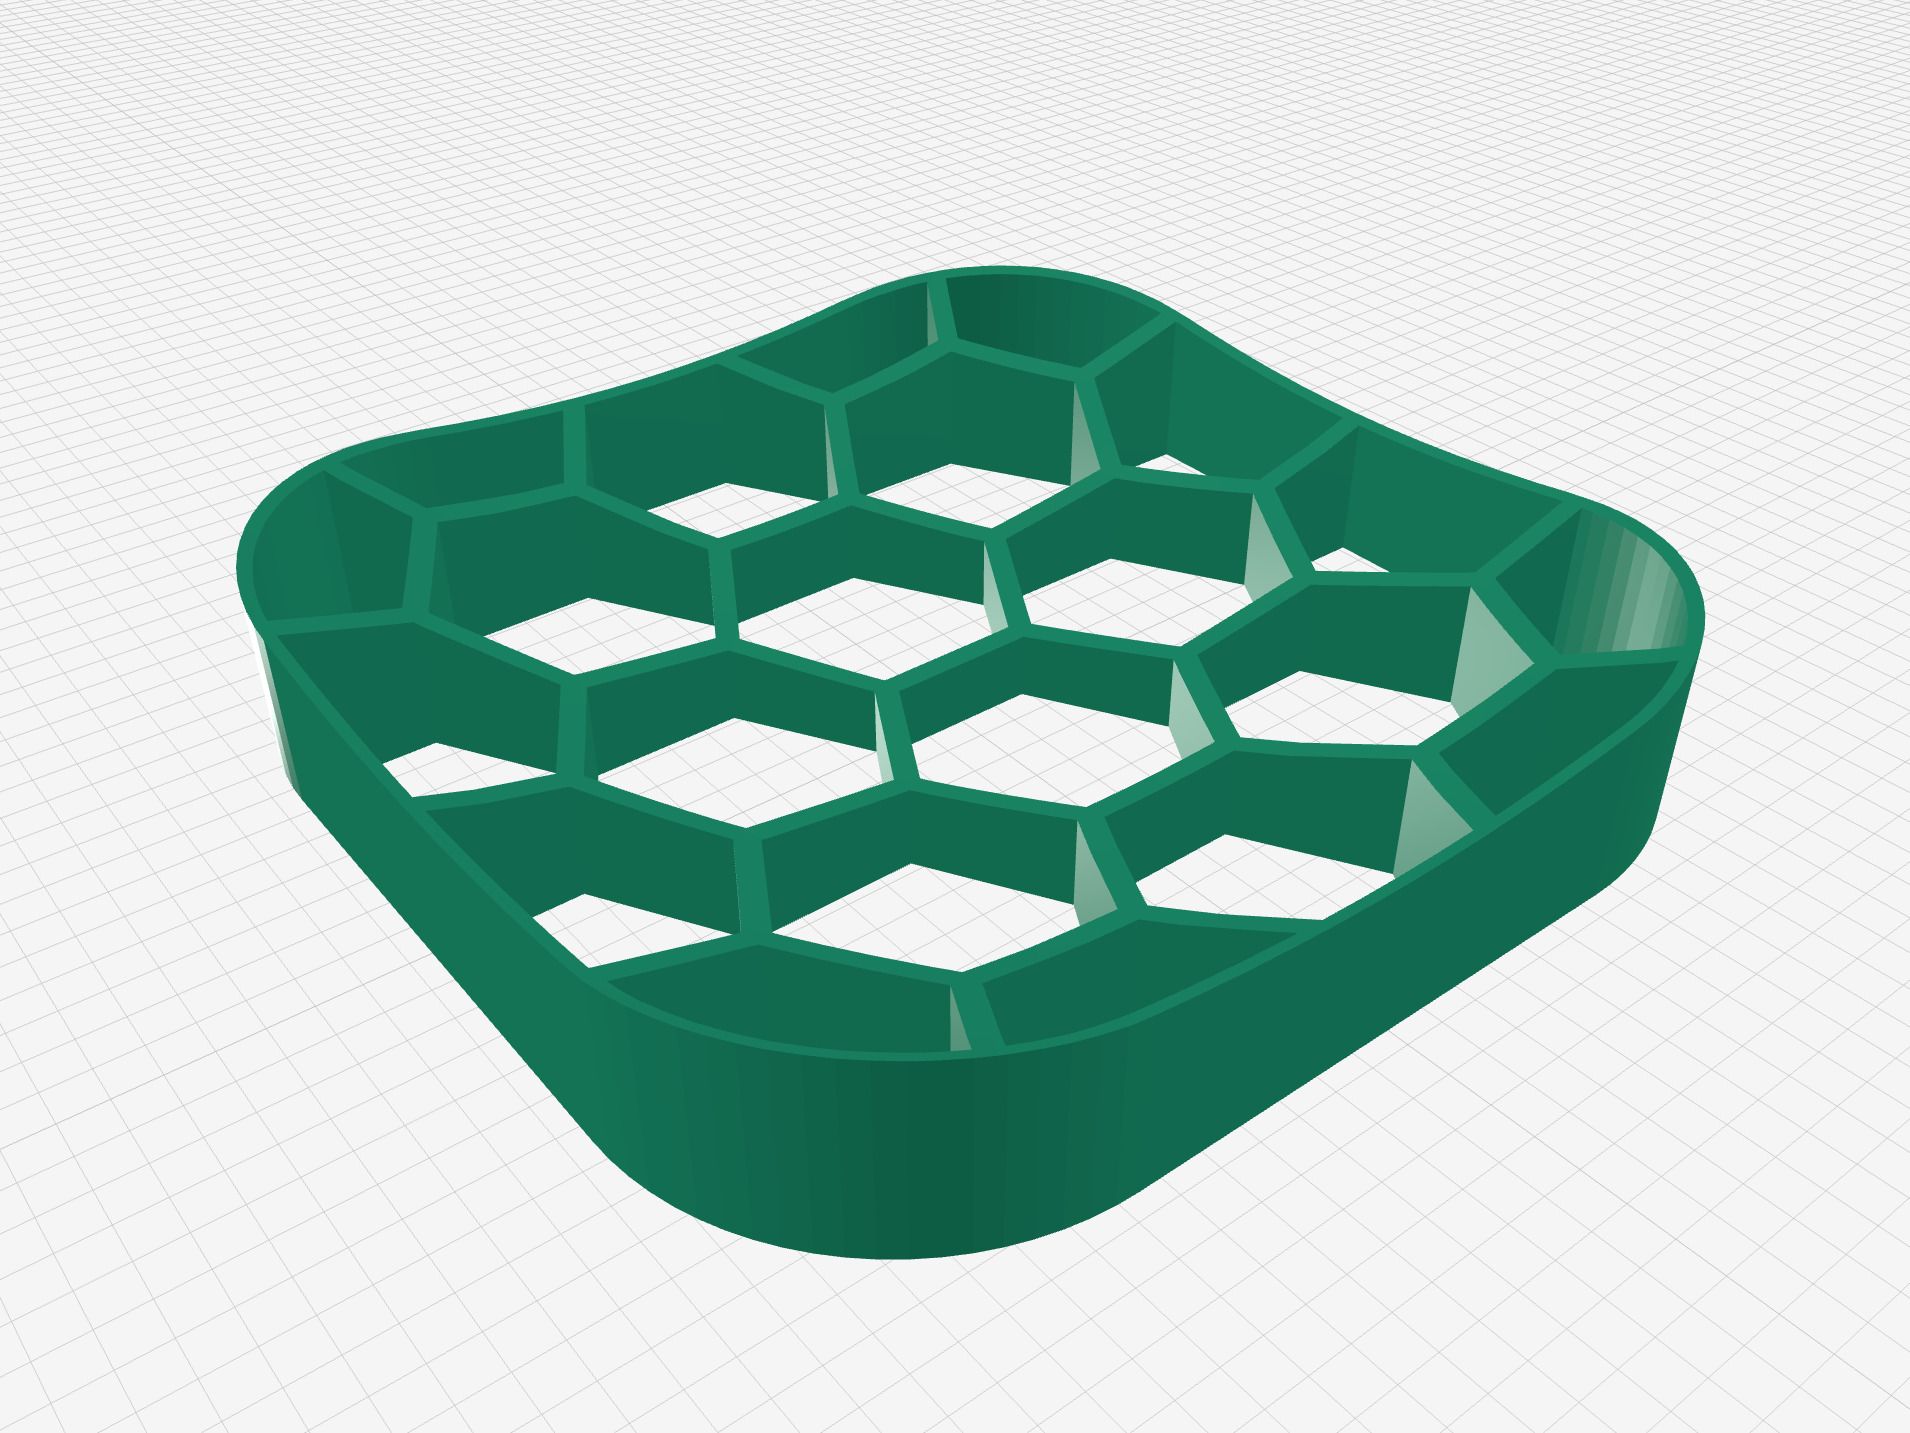
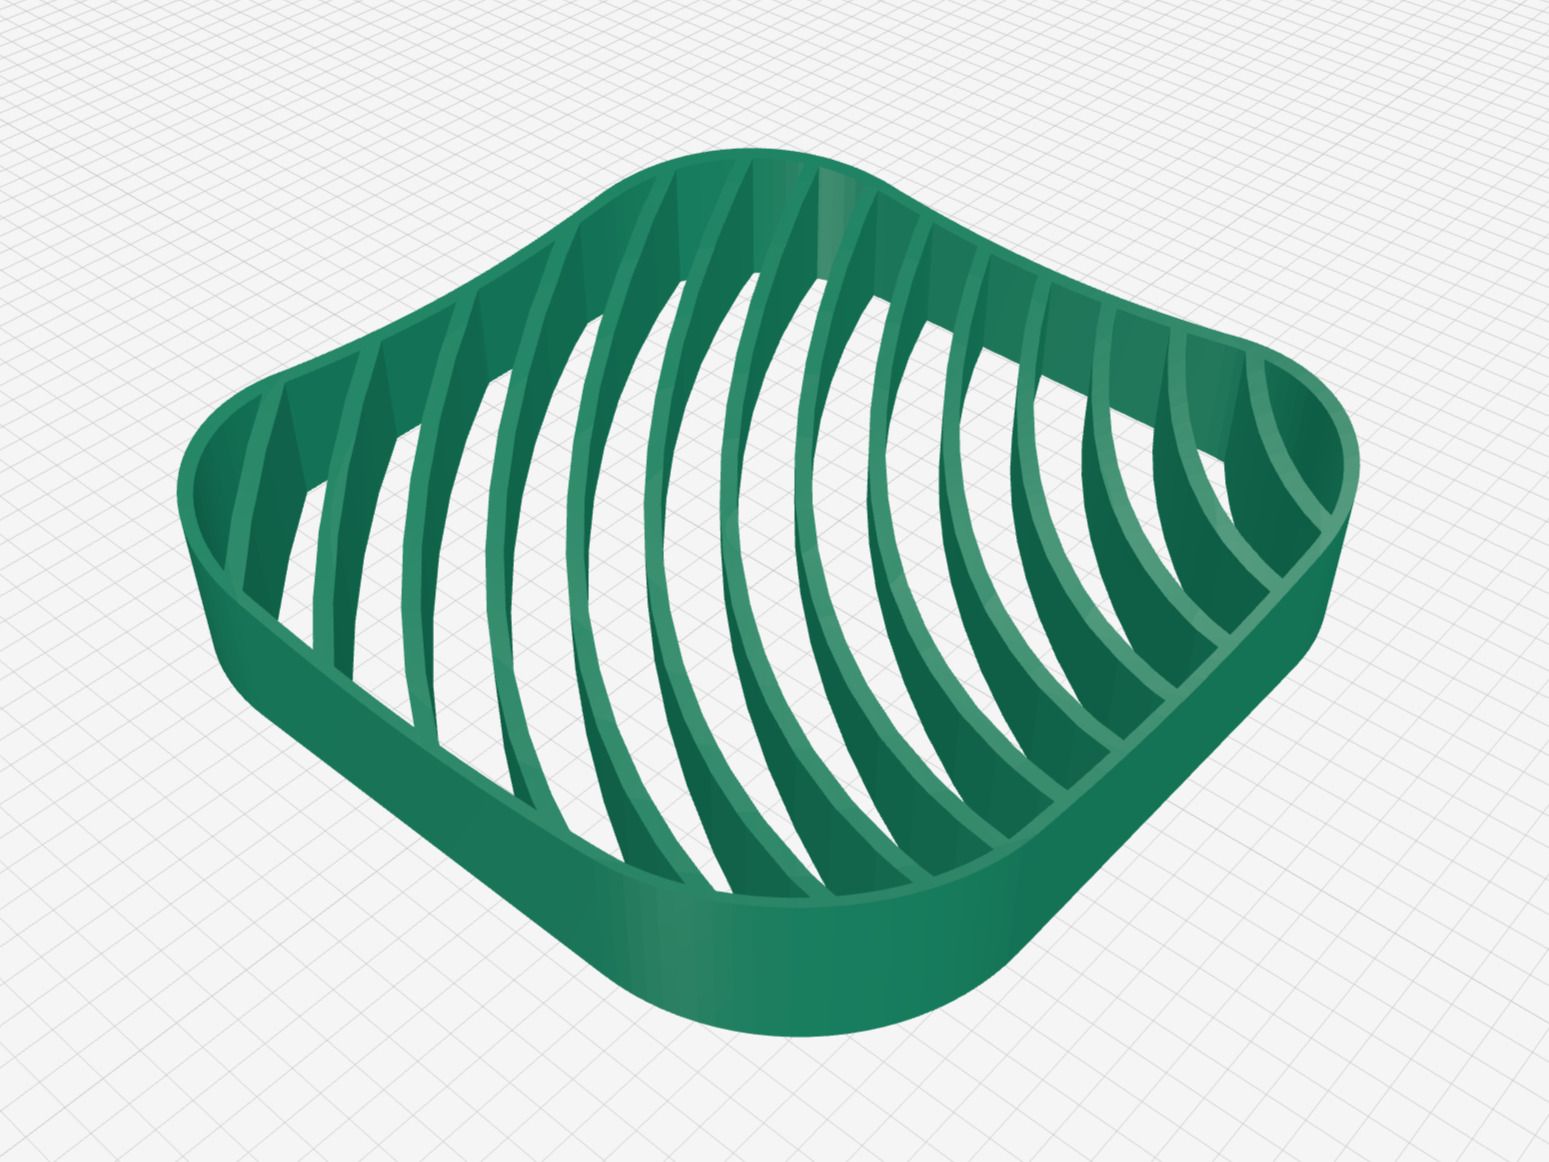
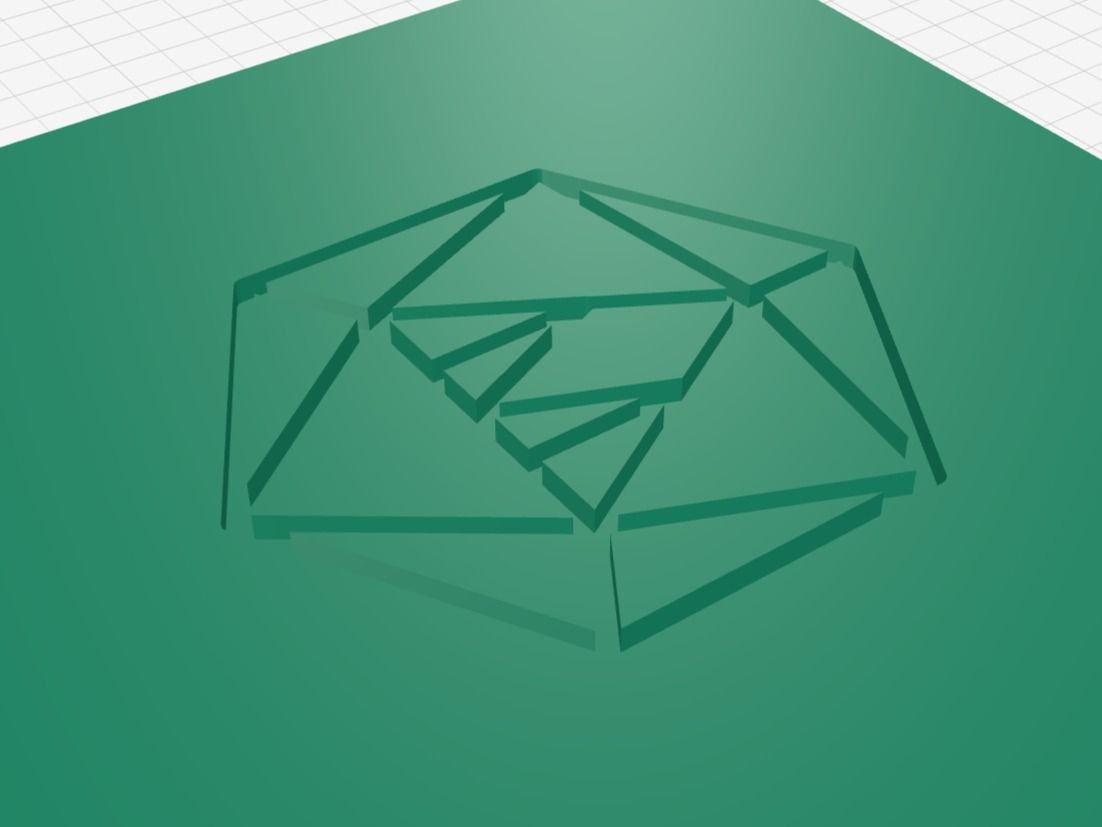
The problems started when I wanted complex geometry. Sinusoidal rib distributions, procedurally generated mazes, things that are genuinely hard to express in static parametric drawings. I turned to ChatGPT and Gemini. They can generate basic OpenSCAD "skeletons" reasonably well. But the geometry is broken in roughly 90% of cases. The code is syntactically perfect. It runs without errors. It just produces... something that doesn't look anything like what you asked for.
So the workflow became: ask ChatGPT for code, paste into OpenSCAD desktop app, render, stare in horror, take a screenshot, draw arrows on it in some image editor, paste the screenshot back into ChatGPT, repeat. Ten iterations per model if you were lucky.
What I built
ModelRift is a browser-based OpenSCAD editor with an embedded AI chat. The core loop: you describe what you want, the AI writes .scad code, OpenSCAD renders it server-side and returns a 3D preview. If the result is wrong, you click "Annotate", draw directly on the rendered model - arrows, rectangles, text labels - and send the annotated screenshot back to the AI.
That annotation step is where most of the work went. Weeks of iteration on just the annotation mode. It uses Fabric.js under the hood, and getting the overlay to composite correctly with the Three.js viewport took longer than I want to admit. But it solves the actual problem: LLMs understand spatial feedback from visual annotations much better than text descriptions like "the left side is too wide."
The model viewer gives you real-time orbit controls, and after each iteration you can see the updated geometry without leaving the page. The diff viewer shows exactly what changed in the .scad code between versions. You can revert to any previous revision.
Technical bits worth mentioning
The stack is React + Three.js (for .stl model preview) on the frontend, Node.js + PostgreSQL on the backend. For the job queue I used pg-boss instead of Redis - it runs on the same Postgres instance and eliminates one infrastructure dependency. Simple tradeoff that I'm happy with.
The AI model is currently Gemini Flash with thinking mode enabled. I evaluated several options and Gemini Flash produced the fewest geometric errors at reasonable cost for this specific use case. The backend runs OpenSCAD as a CLI process, generates multi-view PNG renders using Sharp, and streams progress back to the frontend via Server-Sent Events.
One feature I'm genuinely proud of is SVG import. If you want to engrave a logo or artwork onto a 3D model, you upload an SVG and ModelRift converts it to OpenSCAD geometry. I wrote the converter from scratch: a regex-based SVG path parser that handles M, L, H, V, C, S, A, Z commands, interpolates Bezier curves, and outputs polygon() primitives with correct point indices. No external library. It runs in three modes (polygon, lines, or hybrid) and auto-detects which one fits the input. The result drops directly into the agent's context, so the AI can use your artwork as geometry in the generated model.
One more thing: the intro video for the launch (the logo spinning and title typing in) was generated frame-by-frame from a plain HTML animation using Puppeteer at 60fps, then assembled into an mp4 with ffmpeg. No After Effects, no video editor. Just a Node.js script and some CSS animations.
What shipped since launch
The initial v0.1 was the bare minimum: browser editor, live 3D preview, STL export. Since then:
- v0.2 added a side-by-side code editor with live preview and a diff viewer for tracking changes
- v0.3 added a public model gallery and user profiles - you can browse and remix models without touching the AI assistant at all
- v0.3.1 added revision history (revert to any previous version of your SCAD code)
- v0.3.3 improved SVG import significantly, adding proper polygon and line conversion modes
The public gallery is at modelrift.com/models. Yeah it still does not instantly enable you build a complex assemblies, which took weeks to grap in Fusion 360 or OnShape. But still worth a look even if you're skeptical about AI-generated geometry.
First payment
I got my first payment for ModelRift in 3 weeks after launch.
I still get shivers on first payment - even after launching a lot of SaaS products. This proves the thing is useful to someone and brings value.
First model printed by the community
One of the early things that told me people were actually using this: someone published a real, practical model on the gallery and printed it.
Exhaust hose adapter for small skylight by viewprintlab - a parametric adapter for venting a 3D printer through a small skylight. Adjustable width from 18 to 22 inches, compatible with a 4-inch flexible hose, designed to attach without drilling using command strips. Two parts that print separately and slide together.
It's exactly the kind of model that makes no sense to look for on Printables - too specific to one person's window size - but takes maybe 20 minutes to generate in ModelRift and then works. That's the use case I was building for.
Where it stands
Every new user gets 150 free credits, enough for roughly 15-30 models (depends on the complexity). After that it costs money because the LLM costs money and I'd prefer not to go bankrupt.
This wasn't a weekend project. It took many days and nights, and there are still plenty of things to improve. But my family uses it for our own printing needs now, which is the most honest endorsement I can give.
If you try it, I'd genuinely appreciate feedback: modelrift.com